1956 Ford F100
Automotive Stripping
How to Strip Automotive Paint & Body Filler
Watch as we strip the paint off this classic 1956 Ford F100 Pickup Truck.
The truck’s in surprisingly good shape for its working-class past—but as we dig in, hidden damage is revealed. At some point, the top was badly stoved in, ground back, packed with a huge amount of body filler (Bondo), and repainted.
That left us with two clear Tasks:
1: Stripping multiple layers of paint from the hood’s curved sides.
2: Removing a thick, deeply embedded layer of body filler.
No Sanding—So Easy!
Quick Striptease

Tutorial – Ford F100 Paint & Body Filler Removal
Watch the full Tutorial video below

Ford built the second-generation F-Series from 1953 through 1956, promoting it as the “Triple Economy” line. The range spanned everything from light-duty pickups to heavy commercial models.
This generation introduced the now-familiar three-digit model codes—F-100 through F-350—replacing the previous single-digit scheme, a convention that remains in use today. It also brought several F-Series firsts: a full-width, three-person adjustable seat, available power brakes, and the Ford-O-Matic automatic transmission. Seat belts joined the options list in 1956, mirroring Ford’s passenger-car safety upgrades.
Ford assembled the trucks at eleven plants across the United States. In Canada, they were sold under both Ford F-Series and Mercury M-Series badges, while Ford of Brasil built local versions from 1957 to 1962.

This guide shows how to strip automotive paint and body filler from steel—down to bare metal—without sanding.
Step 1a: Strip the Paint from the Surface of the Steel
- Apply Stripper to the entire painted area (e.g., a hood).
- Wait 20–30 minutes, keeping the surface wet by reapplying Stripper as needed—especially when the paint absorbs it quickly and appears dry.
- Watch for Bubbling:
- In some cases, paint will blister. These bubbles can prevent further penetration, so remove them as they form.
- Scrape Softened Paint:
- Use a sharp blade with a curved edge to gently scrape off the bubbled/softened paint.
- The curved edge helps avoid gouging the steel.
- Paint may come off down to steel or body filler, but some areas may need further stripping.
- Repeat as Needed:
- Reapply Stripper to remaining paint and wait 10–20 minutes.
- Use a Brass Bristled Detail Brush to remove softened paint in tight areas like around bolts.

Step 1b: Strip the Body Filler from the Surface of the Steel
- Apply Stripper directly to the body filler and wait 20 minutes.
- Keep the surface wet with additional Stripper as needed—body filler tends to absorb it quickly.
- Scrape Softened Filler:
- Use a curved-edge blade to remove bubbled or softened filler.
- Most of it may come away, but some filler may remain.
- Repeat if Needed:
- Reapply and repeat Step 1b until all filler is gone.
✅ You should now have exposed steel.
🔄 Move immediately to Step 2 before the surface dries.

Step 2: Strip What’s In the Surface
This step removes paint and filler embedded in ground or sanded steel.
- Apply Stripper to the same area again and wait 5–10 minutes, keeping the surface wet.
- Scrub the Surface:
- Use appropriate scrubbing materials:
- Stripping Wool for smooth areas.
- Cooper’s Grit Embedded Pad for cleaning out grinder marks.
- Detail Brush for bolts and edges.
- Continue applying Stripper during scrubbing to prevent drying.
- Wipe Off Residue:
- Use absorbent toweling to remove dissolved residues with a twisting motion.
- It’s fine if a small amount remains—it can be removed in the next step.
⚠️ Proceed immediately to Step 3 while the surface is still damp.
If it dries, Step 2 must be repeated.

Step 3: Flush the Steel Clean
This step ensures no stripping residue is left behind—no sanding required.
- Spray on Flusher while scrubbing:
- Use a clean Grit Embedded Pad and Detail Brush for bolts.
- Keep the surface wet with Flusher during the process.
- Wipe Off Residue:
- Use a clean, dry, absorbent cloth (like old toweling).
- Wipe with a twisting motion to lift off all diluted residues.
✅ The steel is now clean and ready.
Any surface damage revealed may now be repaired or prepped for finishing.
⚠️ Important Reminder
Flushing (Step 3) is critical—it removes leftover stripper without sanding.
- If you don’t flush, you’ll have to sand.
- If residues are allowed to dry, you must repeat Step 2.

Live Interview – With My Friend Pete


Huge shoutout to Kruzin Kustoms for lending us the F100 hood!
Featured Projects

Car Stripping
Strip Any Paint from metal projects like: Cars, Machinery, Motorbikes, Copper Guttering, Trailers, Metal Windows, Aluminium Caravans
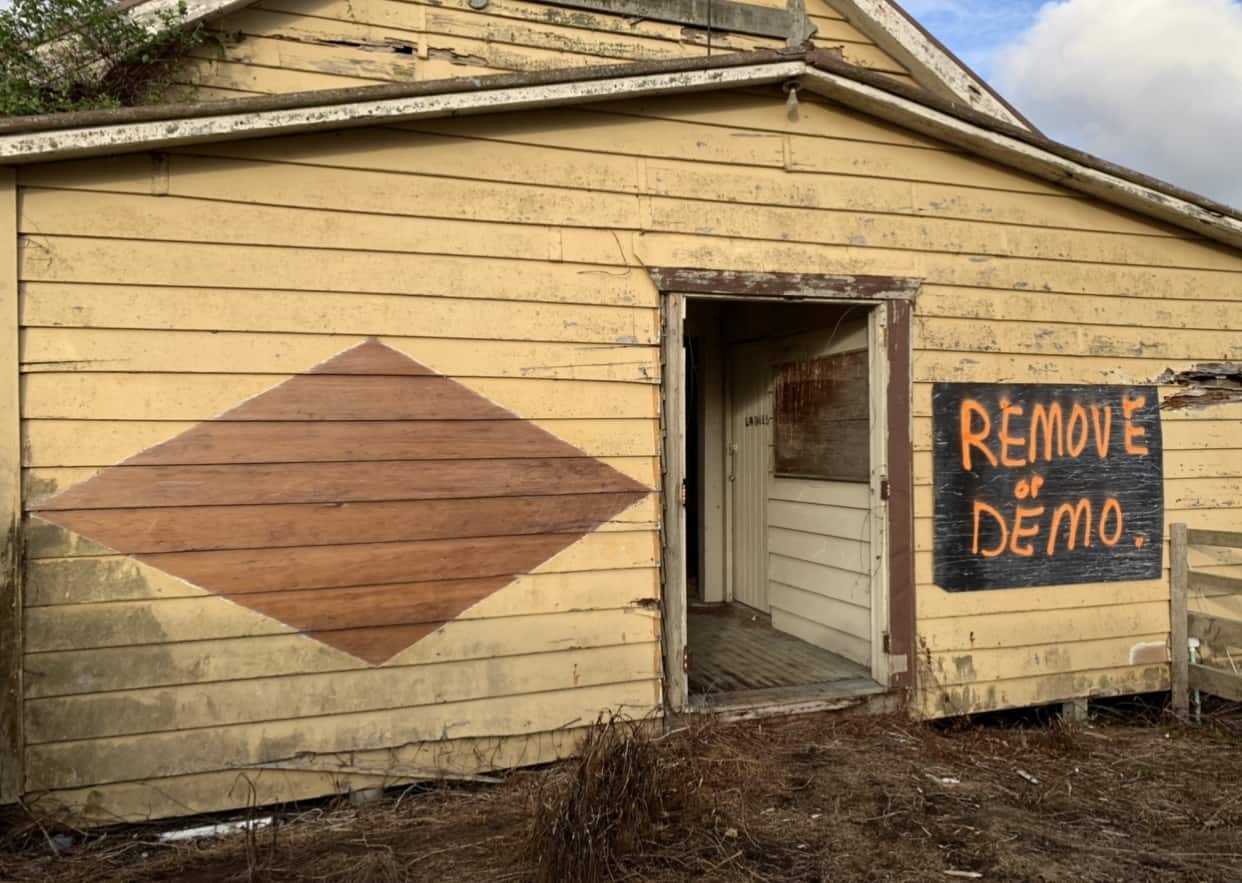
A Diamond in the Rough - Tiriwiri Hall
Another Diamond in the Rough, Learn how easy it is to Strip – Weatherboards – Floors – Windows – Even an old discarded Piano. Enjoy!
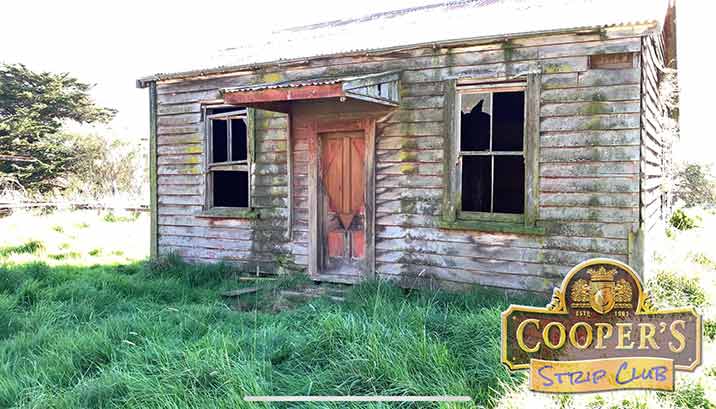
A Diamond in the Rough - The Little Red Cottage of Beaconsfield
Originally built in the